Web Server Vulnerability Scanning with Nikto

Before completing this lab, ensure you are working in a legal and safe environment. If you haven't already, you can set up your own hacking lab by completing our first tutorial:
Setting Up Your Free Virtual Hacking Environment
Now we are going to move into:
Web Vulnerability Scanning
And one of the most well-known beginner web scanning tools in Kali Linux is:
Nikto
Nikto is a web server scanner.
It scans web servers for:
- dangerous files,
- outdated software,
- insecure configurations,
- default files,
- exposed admin portals,
- vulnerable services,
- and common security problems.
This is one of the first tools many beginners use when learning web application testing.
And honestly, it is a good tool for understanding how vulnerable web servers expose information.
What Nikto Actually Does
Nikto sends requests to a web server and compares responses against a large database of known dangerous files, configurations, and weaknesses.
It is not an “instant hacking” tool.
It is an:
Information Gathering Tool
Nikto helps testers identify:
- what software is running,
- whether dangerous files exist,
- whether the server is outdated,
- and what areas deserve closer inspection.
Our Lab Setup
We will continue using:
- Kali Linux = attacker machine
- Metasploitable = target machine
Metasploitable intentionally contains vulnerable web services, making it perfect for learning Nikto.
Step 1 – Start Both Virtual Machines
Open VMware.
Start:
- Kali Linux
- Metasploitable
Wait for both systems to fully boot.
Log into Metasploitable with:
Username: msfadmin
Password: msfadmin
Step 2 – Find The Metasploitable IP Address
Inside Metasploitable, run:
ifconfig
Look for the IP address.
Example:
192.168.182.130
Write this IP down.
Step 3 – Verify The Web Server Is Reachable
Inside Kali Linux, open Firefox.
Visit:
http://TARGET-IP
Example:
http://192.168.182.130
If the Metasploitable web page loads, the target web server is active.
Step 4 – Verify Nikto Is Installed
Nikto is usually included in Kali Linux.
Check by running:
nikto
If Nikto is installed, you should see usage information.
If it is missing, install it:
sudo apt update
sudo apt install nikto
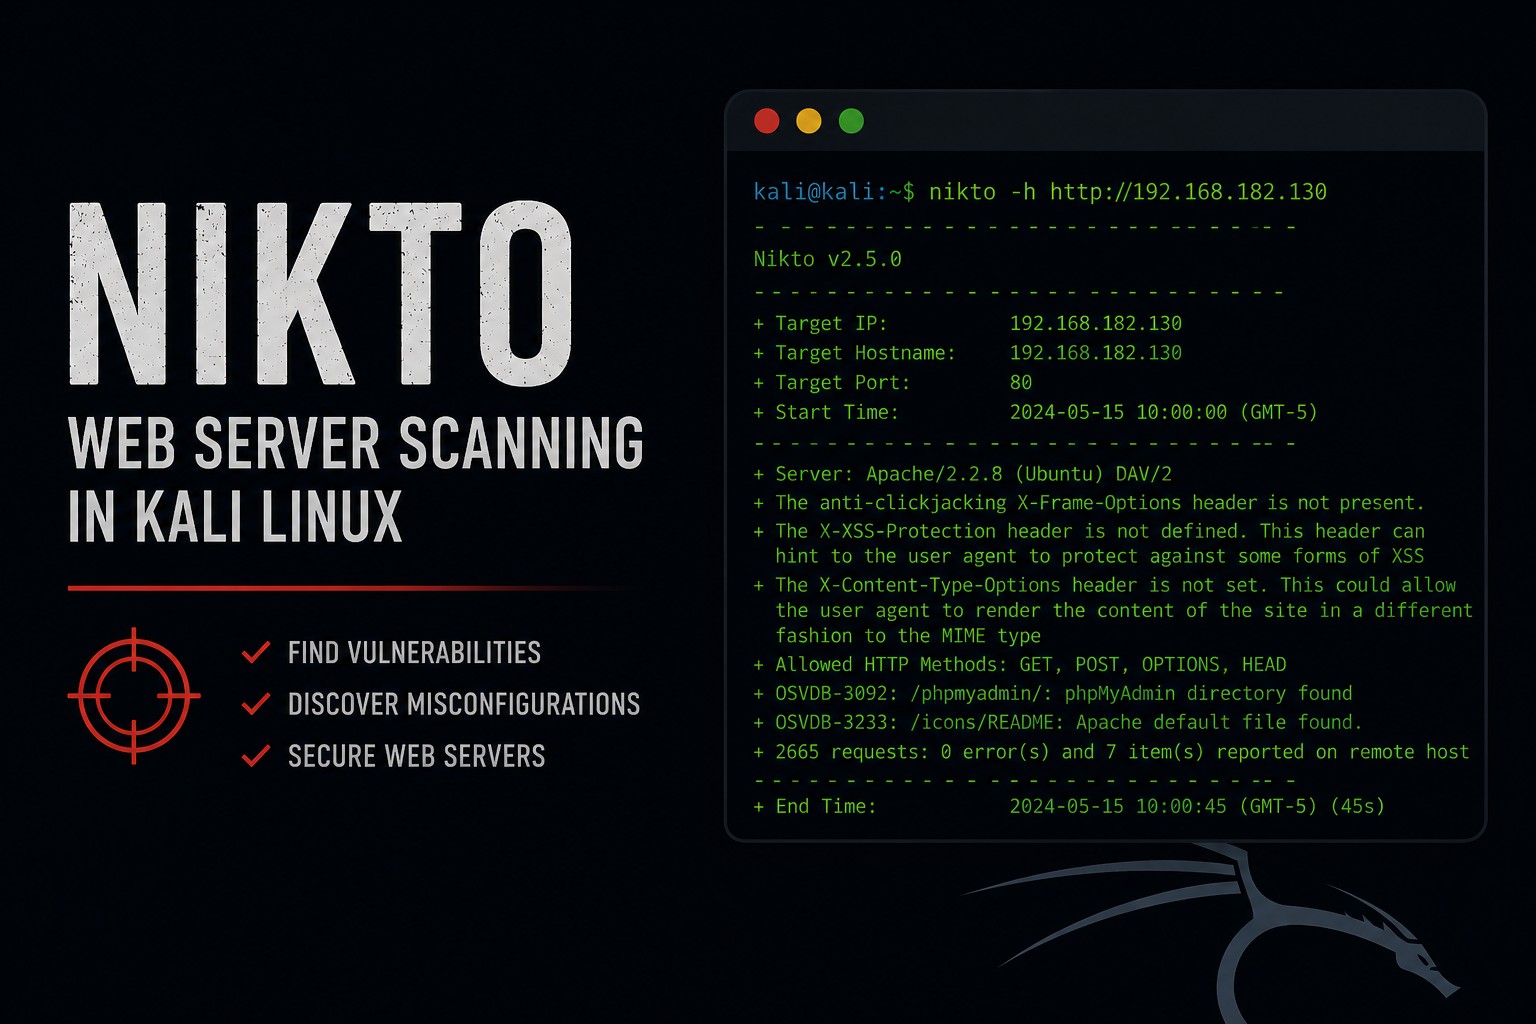
Step 5 – Run Your First Nikto Scan
Now let’s scan the target.
Run:
nikto -h TARGET-IP
Example:
nikto -h 192.168.182.130
Nikto will begin scanning the web server.
This may take a few minutes.
Step 6 – Understanding The Results
Nikto may display results such as:
+ Server: Apache/2.2.8
+ Retrieved x-powered-by header
+ Allowed HTTP Methods: GET, HEAD, POST, OPTIONS
+ OSVDB-877: HTTP TRACE method is active
+ Apache default file found
This information matters.
Let’s break down why.
Step 7 – Understanding Server Banners
Example:
Apache/2.2.8
This tells us:
- the server uses Apache,
- and the exact version is exposed.
Why does this matter?
Because attackers search for known vulnerabilities tied to specific versions.
Outdated software is one of the biggest causes of compromises.
Step 8 – Understanding HTTP Methods
Nikto may display:
Allowed HTTP Methods: GET, HEAD, POST, OPTIONS
HTTP methods define what actions the server allows.
Examples:
| Method | Purpose |
|---|---|
| GET | retrieve content |
| POST | submit data |
| PUT | upload content |
| DELETE | remove content |
Some methods become dangerous when misconfigured.
Step 9 – Understanding TRACE Warnings
Nikto may show:
TRACE method is active
TRACE is an HTTP debugging method.
In some situations, it can contribute to security issues.
This is why scanners flag it.
Step 10 – Understanding Default Files
Nikto often finds:
- default pages,
- test files,
- sample scripts,
- backup files,
- old applications.
Developers constantly leave unnecessary files exposed.
And honestly, this happens far more than people think.
Step 11 – Scan a Specific Port
By default, Nikto scans port 80.
But web servers can run on other ports.
Specify a port with:
nikto -h TARGET-IP -p 8080
Example:
nikto -h 192.168.182.130 -p 8080
This becomes important during larger assessments.
Step 12 – Save Scan Results
Professional testers save results.
Output scan results to a file:
nikto -h TARGET-IP -o nikto-results.txt
Example:
nikto -h 192.168.182.130 -o nikto-results.txt
Now read the results:
cat nikto-results.txt
Or:
less nikto-results.txt
Step 13 – Export HTML Reports
Nikto can also create HTML reports.
Example:
nikto -h TARGET-IP -Format html -o nikto-report.html
Example:
nikto -h 192.168.182.130 -Format html -o nikto-report.html
Now open the report in Firefox:
firefox nikto-report.html
This creates cleaner documentation.
Step 14 – Scan HTTPS Targets
Some servers use HTTPS.
Nikto supports SSL scanning.
Example:
nikto -h https://TARGET-IP
Example:
nikto -h https://192.168.182.130
Nikto will attempt SSL/TLS connections.
Step 15 – Understanding False Positives
Nikto is useful.
But it is noisy.
And beginners need to understand this:
Scanner output is not always accurate.
Nikto may:
- report outdated findings,
- generate false positives,
- or flag things that are low risk.
Real testing requires:
- verification,
- investigation,
- and context.
This is why blindly trusting scanners is dangerous.
Step 16 – Combining Nikto with Gobuster
Gobuster and Nikto work very well together.
Gobuster helps find:
- hidden directories,
- admin panels,
- backup files,
- uploads.
Nikto helps identify:
- outdated software,
- dangerous files,
- insecure configurations,
- exposed services.
This combination teaches real reconnaissance workflow.
Step 17 – Common Beginner Mistakes
Thinking Nikto Automatically Hacks Servers
Nikto is mainly a scanner.
It identifies possible issues.
It does not magically compromise systems.
Ignoring False Positives
Always verify findings manually.
Only Scanning Port 80
Web services run on many ports.
Forgetting Documentation
Save your results.
Professional testing requires documentation.
Step 18 – Useful Nikto Commands
Basic scan
nikto -h TARGET-IP
Scan specific port
nikto -h TARGET-IP -p 8080
Save results
nikto -h TARGET-IP -o results.txt
Create HTML report
nikto -h TARGET-IP -Format html -o report.html
HTTPS scan
nikto -h https://TARGET-IP
Step 19 – Why Nikto Matters
Nikto teaches important concepts:
- web server analysis,
- configuration weaknesses,
- outdated software risks,
- HTTP methods,
- vulnerability scanning,
- reconnaissance methodology,
- and reporting.
And honestly, understanding web infrastructure matters enormously in cybersecurity.
Because most organizations rely heavily on web applications.
Closing Thoughts
Nikto is one of the easiest ways to begin learning web server security testing in Kali Linux.
And while it is simple, it teaches several important lessons:
- old software becomes dangerous,
- unnecessary files expose information,
- misconfigurations matter,
- and reconnaissance is critical.
In the next tutorials, we will continue exploring Kali Linux tools, web application testing, traffic interception, and penetration testing concepts inside our hacking lab.
Please Subscribe to keep up with future tutorials, and always feel free to contact me or leave a comment below.