Web Request Interception with Burp Suite

Before completing this lab, ensure you are working in a legal and safe environment. If you haven't already, you can set up your own hacking lab by completing our first tutorial:
Setting Up Your Free Virtual Hacking Environment
Now we are moving into one of the most important web application testing tools in cybersecurity:
Burp Suite
And honestly, if you eventually work in web application security, you will probably use Burp constantly.
Burp Suite is used for:
- intercepting requests,
- modifying web traffic,
- analyzing responses,
- testing authentication,
- finding vulnerabilities,
- and understanding how web applications actually communicate.
This is where beginners finally start seeing how websites truly work behind the scenes.
What Burp Suite Actually Does
Every time you interact with a website:
- log in,
- click buttons,
- submit forms,
- search,
- upload files,
- or change settings,
…your browser sends HTTP requests to a web server.
Burp Suite allows you to:
Intercept Those Requests
That means you can:
- inspect them,
- modify them,
- resend them,
- and analyze responses.
This is foundational knowledge for web application testing.
Our Lab Setup
We will continue using:
- Kali Linux = attacker machine
- Metasploitable = target machine
Metasploitable contains intentionally vulnerable web applications that are perfect for learning Burp Suite.
Step 1 – Start Both Virtual Machines
Open VMware.
Start:
- Kali Linux
- Metasploitable
Wait until both systems fully boot.
Log into Metasploitable with:
Username: msfadmin
Password: msfadmin
Step 2 – Find The Metasploitable IP Address
Inside Metasploitable, run:
ifconfig
Look for the IP address.
Example:
192.168.182.130
Write this IP down.
Step 3 – Verify The Website Loads
Inside Kali Linux, open Firefox.
Visit:
http://TARGET-IP
Example:
http://192.168.182.130
You should see the Metasploitable web page.
Step 4 – Open Burp Suite
Inside Kali Linux, open Burp Suite.
You can:
- search for Burp Suite in the applications menu,
- or launch it from terminal.
Example:
burpsuite
Burp Suite may take a minute to fully load.
Step 5 – Initial Burp Suite Setup
When Burp starts:
- Select Temporary Project
- Click Next
- Use the default configuration
- Click Start Burp
Burp Suite Community Edition is completely fine for learning.
Step 6 – Understanding The Burp Proxy
Burp works by acting as a:
Proxy
That means your browser sends traffic through Burp before reaching the target website.
This allows Burp to:
- intercept requests,
- inspect traffic,
- and modify data.
Think of Burp as a middleman between your browser and the server.
Step 7 – Verify The Proxy Is Working
Burp usually configures Firefox automatically in Kali.
Now inside Burp:
- Go to the Proxy tab
- Then Intercept
Make sure:
Intercept is on
Now go back to Firefox and refresh the Metasploitable page.
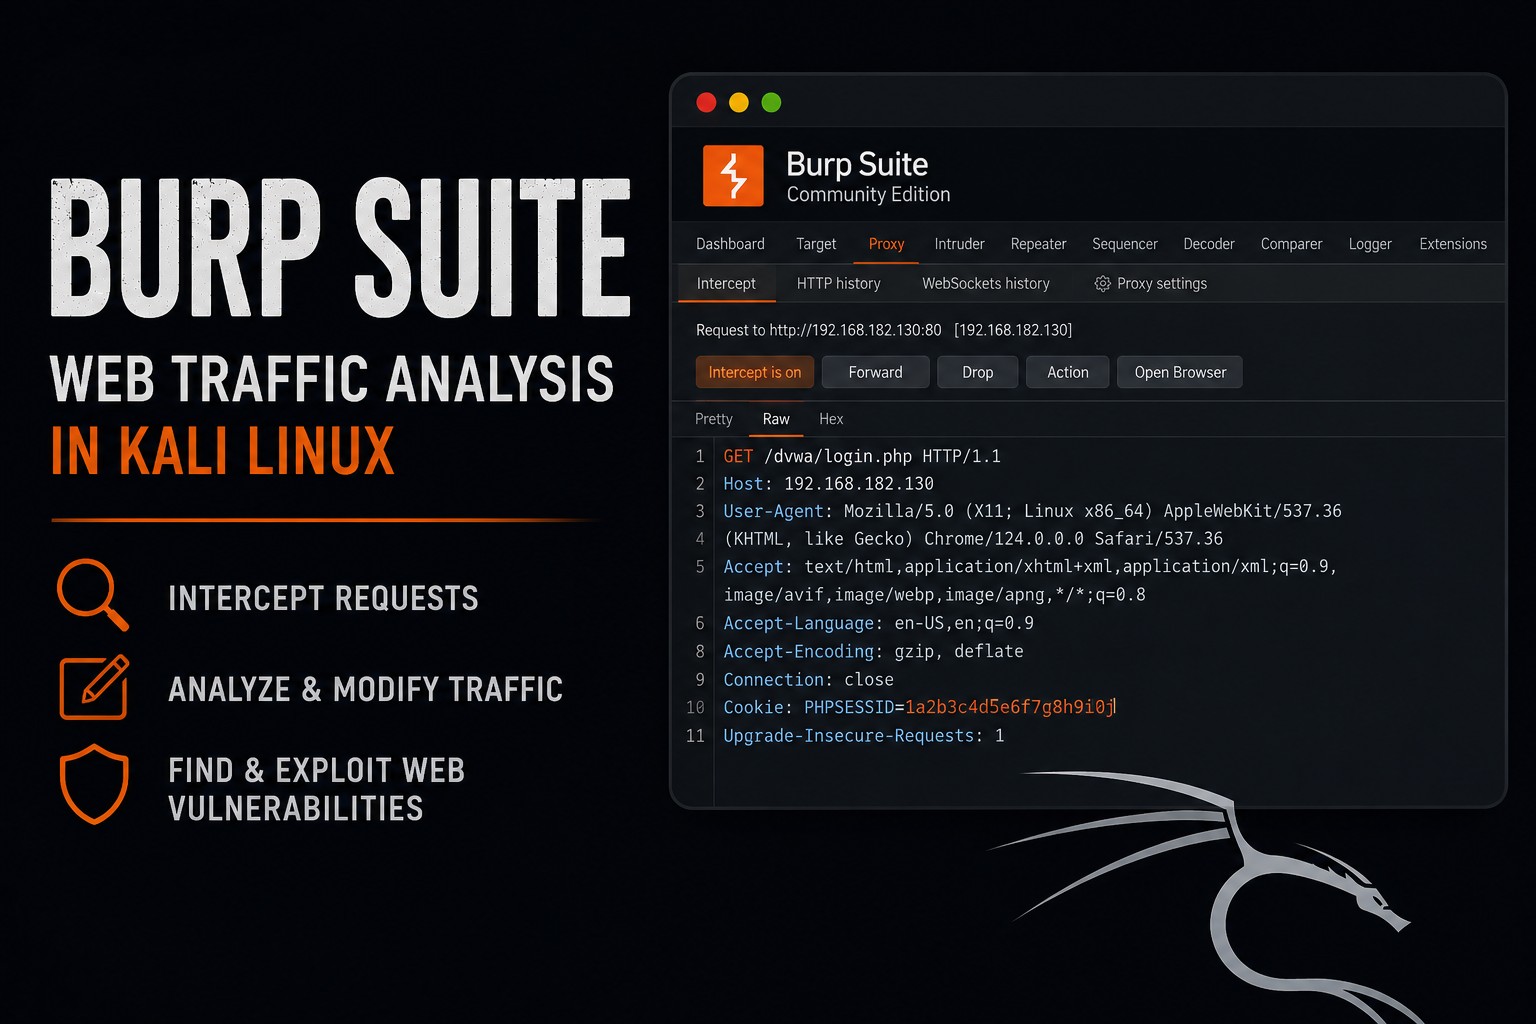
Step 8 – Intercept Your First Request
If everything is working correctly, Burp will stop the request before it reaches the server.
You should now see raw HTTP traffic.
Example:
GET / HTTP/1.1
Host: 192.168.182.130
User-Agent: Mozilla/5.0
Accept: text/html
This is your first intercepted web request.
And honestly, this is where web security starts making sense.
Step 9 – Understanding HTTP Requests
HTTP requests contain several parts.
Request Method
Example:
GET
Common methods include:
| Method | Purpose |
|---|---|
| GET | retrieve content |
| POST | send data |
| PUT | upload content |
| DELETE | remove content |
Headers
Headers contain metadata.
Examples:
User-Agent
Cookie
Host
Referer
Request Body
POST requests often contain submitted data.
Example:
username=admin&password=test
Step 10 – Forward The Request
Inside Burp, click:
Forward
The request will continue to the server.
The page should now load in Firefox.
Step 11 – Turn Intercept Off
For normal browsing:
- Return to the Intercept tab
- Click:
Intercept is off
Otherwise Burp will keep stopping every request.
Step 12 – Browse The Metasploitable Applications
Metasploitable includes intentionally vulnerable applications.
Browse around the site.
Click links.
Open login forms.
Every request should now appear inside Burp’s history.
Step 13 – Use HTTP History
Inside Burp:
- Go to:
Proxy → HTTP History
You will now see:
- requests,
- responses,
- status codes,
- content types,
- paths,
- and methods.
This is extremely valuable for understanding application behavior.
Step 14 – Intercept A Login Request
Find a login form inside Metasploitable.
Enter:
Username: admin
Password: test
Turn interception back on.
Submit the login form.
Burp should capture the POST request.
Example:
POST /login.php HTTP/1.1

username=admin&password=test
This is where you start understanding how authentication works.
Step 15 – Modify A Request
Before forwarding the request, try changing:
password=test
to:
password=wrongpassword
Then click:
Forward
Now observe how the application responds.
This is one of the most important concepts in web testing:
Manipulating Requests
Because web applications trust user input far more than they should.
Step 16 – Send Requests To Repeater
Burp includes a tool called:
Repeater
This allows you to resend requests repeatedly.
Inside Burp:
- Right-click a request
- Select:
Send to Repeater
Now open the:
Repeater
tab.
You can:
- modify requests,
- resend requests,
- analyze responses,
- and experiment safely.
Step 17 – Understanding Cookies
Websites often use cookies for authentication.
Example:
Cookie: PHPSESSID=abc123
Cookies help websites remember users.
But poorly secured cookies can create vulnerabilities.
Burp makes cookies easy to inspect.
Step 18 – Understanding Status Codes
Burp responses include status codes.
Common ones include:
| Status | Meaning |
|---|---|
| 200 | success |
| 301 | redirect |
| 302 | temporary redirect |
| 403 | forbidden |
| 404 | not found |
| 500 | server error |
These responses reveal important information about applications.
Step 19 – Understanding Why Burp Matters
Burp teaches critical concepts:
- HTTP requests,
- authentication,
- sessions,
- cookies,
- web traffic,
- request manipulation,
- application behavior,
- and client-server communication.
And honestly, this is where many beginners finally understand:
Websites Are Just Requests and Responses
That understanding is huge.
Step 20 – Common Beginner Mistakes
Leaving Intercept On
Beginners constantly forget interception is enabled.
Then nothing loads in the browser.
Ignoring HTTP History
HTTP history is incredibly valuable.
Blindly Clicking Around
Observe requests carefully.
Understanding traffic matters more than speed.
Thinking Burp Automatically Hacks Things
Burp is primarily an analysis and testing tool.
The user still needs to understand the application.
Step 21 – Useful Burp Workflow
Basic beginner workflow:
- Browse the application
- Watch requests in HTTP History
- Intercept important requests
- Modify requests
- Replay requests in Repeater
- Observe responses
- Document findings
This workflow becomes the foundation for web application testing.
Step 22 – Useful Burp Features
Burp Suite includes many tools.
Important beginner tools include:
| Tool | Purpose |
|---|---|
| Proxy | intercept traffic |
| HTTP History | view requests |
| Repeater | resend requests |
| Decoder | encode/decode data |
| Comparer | compare responses |
Professional versions include far more features, but beginners do not need them yet.
Closing Thoughts
Burp Suite is one of the most important tools in web application security.
And honestly, learning Burp changes how you look at websites forever.
Because now you can finally:
- see requests,
- inspect traffic,
- understand sessions,
- analyze forms,
- and observe how applications truly communicate.
This is foundational knowledge for:
- SQL injection,
- authentication testing,
- session testing,
- API testing,
- web exploitation,
- and application security.
In the next tutorials, we will continue exploring Kali Linux tools, traffic analysis, web application testing, and penetration testing concepts inside our hacking lab.
Please Subscribe to keep up with future tutorials, and always feel free to contact me or leave a comment below.